Create Exe from a Java Project with Many Jars Included
With 3 steps you can easily create an exe file from your project that may have many included jar libraries (mine had 14 jars). I used Netbeans 8.0.2, lauch4j 3.16, and Linux Netrunner 14 for this process.
1) Create your xml file with launch4j: It is required on the build level and will be done only one time. Simple details will be enough like min jre level and name etc.Here what I use as xml file for launch4j.It just takes icon file and min jre.
<?xml version="1.0" encoding="UTF-8"?>
<launch4jConfig>
<dontWrapJar>false</dontWrapJar>
<headerType>gui</headerType>
<jar>/home/mstf/NetBeansProjects/MyProject/exe/MyAppJarName.jar</jar>
<outfile>/home/mstf/NetBeansProjects/MyProject/exe/MyProject.exe</outfile>
<errTitle></errTitle>
<cmdLine></cmdLine>
<chdir>.</chdir>
<priority>normal</priority>
<downloadUrl>http://java.com/download</downloadUrl>
<supportUrl></supportUrl>
<stayAlive>false</stayAlive>
<restartOnCrash>false</restartOnCrash>
<manifest></manifest>
<icon>/home/mstf/Pictures/S.ico</icon>
<jre>
<path></path>
<bundledJre64Bit>false</bundledJre64Bit>
<bundledJreAsFallback>false</bundledJreAsFallback>
<minVersion>1.6.0</minVersion>
<maxVersion></maxVersion>
<jdkPreference>preferJre</jdkPreference>
<runtimeBits>64/32</runtimeBits>
</jre>
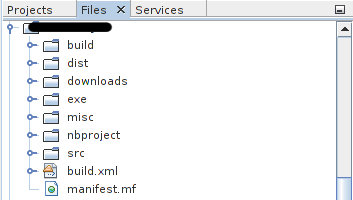
</launch4jConfig>Create a folder and name it misc under your project folder (Mine is /home/mstf/NetbeansProjects/MyProject/misc).Your one jar file will be exported to exe folder ( which you don’t have to create since it will be created automatically) and put this temporary xml to misc folder with the name l4j-myapp.xml
2) Add a new build target to your build.xml to run Launch4j automatically.It can found under your project on the Files tab.
Open build.xml and add these target code before the </project> closing. You need to update your lauch4j folder by using location after the <property name=”launch4jexe.dir” tag. Also you can give any name to your one jar output file but it is not important.Save the build.xml file and close it.
<target name="package-for-launch4j" depends="clean,compile,jar">
<property name="launch4jexe.dir" location="/home/mstf/Downloads/launch4j" />
<taskdef name="launch4j"
classname="net.sf.launch4j.ant.Launch4jTask"
classpath="${launch4jexe.dir}/launch4j.jar
:${launch4jexe.dir}/lib/xstream.jar" />
<property name="launch4j.jar.name" value="YourOneJarName"/>
<property name="launch4j.dir" value="exe"/>
<property name="launch4j.jar" value="${launch4j.dir}/${launch4j.jar.name}.jar"/>
<echo message="Packaging ${application.title} into a single JAR at ${launch4j.jar}"/>
<delete dir="${launch4j.dir}"/>
<mkdir dir="${launch4j.dir}"/>
<jar destfile="${launch4j.dir}/temp_final.jar" filesetmanifest="skip">
<zipgroupfileset dir="dist" includes="*.jar"/>
<zipgroupfileset dir="dist/lib" includes="*.jar"/>
<manifest>
<attribute name="Main-Class" value="${main.class}"/>
</manifest>
</jar>
<zip destfile="${launch4j.jar}">
<zipfileset src="${launch4j.dir}/temp_final.jar"
excludes="META-INF/*.SF, META-INF/*.DSA, META-INF/*.RSA"/>
</zip>
<delete file="${launch4j.dir}/temp_final.jar"/>
<launch4j configFile="misc/l4j-myapp.xml" />
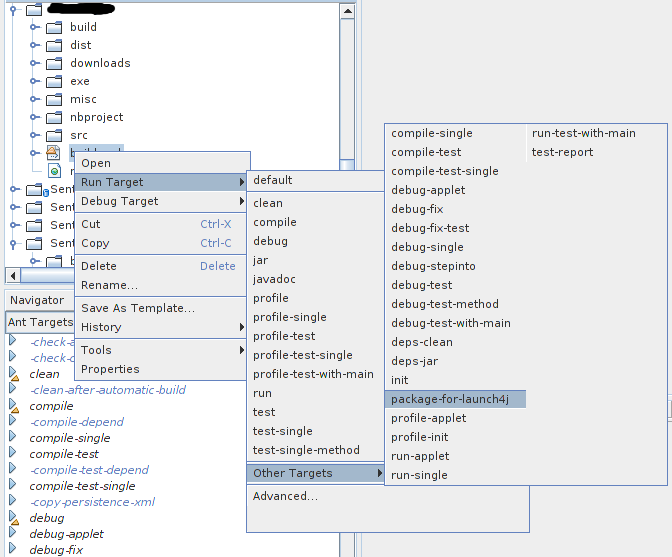
</target>3) The last step is creating your exe. Now again using the same Files tab click right on the build.xml and click on Run Target -> Other Targets -> package-for-lauch4j
Compile output will be like this and if there is no error you can get your exe under exe folder.
package-for-launch4j:
Packaging MyProject into a single JAR at exe/MyAppJarName.jar
Deleting directory /home/mstf/NetBeansProjects/MyProject/exe
Created dir: /home/mstf/NetBeansProjects/MyProject/exe
Building jar: /home/mstf/NetBeansProjects/MyProject/exe/temp_final.jar
Building zip: /home/mstf/NetBeansProjects/SentioSync/exe/MyAppJarName.jar
Deleting: /home/mstf/NetBeansProjects/MyProject/exe/temp_final.jar
Compiling resources
Linking
Wrapping
Successfully created /home/mstf/NetBeansProjects/MyProject/exe/MyProject.exe
BUILD SUCCESSFUL (total time: 20 seconds)